


Guide on How to Build a Fish House
A Modern day Fish House, Ice Shack, Shanty, Ice House or whatever you want to call them will vary from one region to the next. Here in Minnesota we would refer to them as Fish Houses, in which Minnesota is the leader in these modern day versions of the old candle lit shacks of the ice.
I can remember when I was young going ice fishing in a wood box, dragging it from shore, hand drilling the holes, hopefully over fish and then try to get the fire going. After the work was done I sat on a hard wooden bench watching a bobber for hours trying to catch fish through a hole in the ice. It was dark and hard to see, either from the lack of windows or the smoke from the wood stove burning my eyes. After your eyes adjusted then you needed to be careful not to burn your line off from the candle.
Today’s Modern Fish House is a far cry from the old days, Thank God.
The possibilities are endless, from a simple shack to a Taj Mahal you will find abound the frozen lakes. All the amenities of home can be found on the ice from power lights, TV’s, cook stoves, bathrooms, padded seats and warmth.
I believe the biggest Modern day item in the fish house world would be the retractable wheel, they take the hard out of hard water fishing. With wheels on your house it is easy to move, relocate and can travel further than years ago. Use of retractable wheels is an easy 5 minute setup.
Fish Houses today are built with a variety of materials such as wood, vinyl, aluminum, fiberglass. The main structure might be similar to the box of the old days. If you have any carpentry skills or not you can build a fish house. A wood framed fish house is built the same as your home just on a smaller scale. If you can use a saw, drill and hammer you should be able to build your own fish house. If you can weld, then you can build your own frame and if you have more expertise you can build your own wheels.
Carpentry, welding and machining skills will allow you to build your own
fish house on wheels. Without any skills you may need some help in all or parts of the areas. If you find your mechanically inclined skills are not to par then go buy one already finished. Buying a fish house can cost anywhere from $100.00 to as much as $50,000.00.
Generally you should be able to build a fish house for half the cost of purchasing one.
When you decide to build your own fish house then you need a plan, you need to know what you want. Plan ahead, you don’t have to build every feature into your fish house at once as it can always be added later, if you planned to add it later. When designing a fish house keep in mind where the windows and door should be, heater placement, benches, table, bunks, fishing holes, lights.
The size of the house is the starting point, typically house are 6-1/2 feet wide x 10, 12, 14, 16 foot long. There are wider and longer houses out there, wider house such as 8 ft are roomy but harder to haul around, you can’t see around them when towing. In Minnesota fish houses are considered trailers and must meet the laws for trailers.
This means they can’t exceed 8’-6” wide, they need to be licensed, safety chains and lights are required and need brakes if over 3500 lbs. If you decide on building an 8’ wide fish house put a window in the front and back of the house, this way when towing you can see through the house.
When planning on building a longer house some of the lake landings can be hard to get the house on and off. If there is an ice ridge or steep grade to the ice you may get hung up. House size will determine house weight, bigger usually means heavier. If you pull your fish house with an ATV it should be able to handle a heavy house but the ice might not handle the weight. I haven’t seen a floating fish house, yet.
If you buy a frame for your house, you get what to pay for. Avoid frames built with angle iron, they are not strong enough for a larger house. Look at the wheel system, does it look strong enough, make sure you know the axle weight, heavier is better here. An axle weight rating is for a normal trailer, a fish house frame is different because of the split wheel set up. Chances are you will never break a spindle itself, the parts the spindle is connected to would break first. A frame with or without suspension, depends on the house size and how much traveling you plan on.
Okay we are ready to get into building the house.
After you have figured out what you want then you can start building the house.
I have designed easy to follow blue prints to build your own fish house and wheel systems available
View Plans Here.
The plans include material lists, drawings and photos to build your own fish house on wheels.
The Fish House Frame
If you can cut and weld steel you can build this. All the steel can be purchased from various places, you”ll need to check around. The wheel system is a little more difficult, this take precise measurements to make everything fit correctly. A hack saw or torch might not work well here.
Click here for wheel system plans if you’re not comfortable building these, a local welding/machine shop might build them for you.
After your frame is built get it sandblasted and painted, or use a bed liner product.
Depending on where you might place trailer lights, run wiring through frame or through the house, in the house is easier. Usually on 8 ft wide house I place the light on the back of the house, a narrower frame can be placed on the house or on the frame, normally on a bracket. If placing lights, tail light and side marker lights on the frame remember if there low to the ground they might get broke from ice chunks, or from a shovel if you bank the house with snow.
Cross members are placed 24 inches on center, so it works best with ¾”green treated plywood. Insulate the frame floor with 2” rigid foam insulation, between the steel frame cross members, make it a tight fit so it wont fall out, then place plywood over steel frame, screw it to the frame. The new green treated lumber corrodes regular screws and requires special fasteners made for treated lumber. If you’re not traveling far and just want an old style skid floor I have plans for that to.
The Fish House
The house is built using general construction methods, most framing is a 2×2 framing.
Most home improvement and lumber yards have pre cut 2×2’s, DON’T use them.
Why, because they usually will warp, if you do use them buy them in a wrapped bundle and keep them wrapped until ready to use.
A 2×2 is considered 1-1/2“x 1-1/2” but there are normally 1-3/8” which screws you up with the use of rigid insulation which is exactly 1-1/2”. If the studs are thinner than the insulation it will cause the interior paneling to dip in where it meets the studs. Use rigid foam insulation (normally pink or yellow) because it adds strength of the walls. Fiberglass has no strength and can wiggle its way down the wall over time. If you use fiberglass use a spray adhesive to hold it in place and use a plywood outer covering to add rigidness to the wall..
Wall Framing
Cut 1-1/2” x 1-1/2” (these are called 2×2’s) studs from a 2×6 you can get 2 of them from one 2×6, use a table saw. The top and bottom plates can be 2×2’s or 2×4’s depending on how you fasten them to the studs. If you screw them together a 2×2 is easier, you only need 3-3-1/2” screws. A 2×4 plate you would need 5” or longer screws. I don’t recommend a framing nail gun, it will split the 2×2’s. Screws may split also, pre drill them. If you use a sheeting staple gun either size plate is fine, staple them together from the side with half the staple in the plate and the other half in the stud, use 2 per side. Top plate must be one piece the length of the wall, don’t splice it. Cut top and bottom plates to size, measure stud placement, normally 16” on center and window and door rough opening sizes onto plates. Cut studs to size, usually 7’ works best. Lay plates on the floor and lay out studs on your marks and fasten together. Build all four walls then fasten them to the plywood floor on your frame using metal screws so they go through the bottom 2×2, plywood and into the steel frame. After all 4 walls are standing fasten each wall at the corners, keep the outside edges even. The walls will be flimsy at this point, you can attach a 2×4 diagonally on each wall and this will stiffen the walls. If you use a level on the walls make sure the frame is level as well, or measure diagonally from corner to corner, when it’s the same measurement it’s square. Square is more important than level unless you know the frame is exactly level.
Add roofing framing, this can be 2×4’s for a flat roof or use 2×6’s and cut a taper from the center to the outside edge for a pitched roof. The walls need some sort of sheeting whether its plywood on the exterior or paneling on the interior, it’s part of the strength.
Exterior plywood siding can be used, if your planning on using Vinyl or Aluminum siding you should still use 1/4 or 3/8” plywood under the siding, it will add weight but will be stronger. Attach plywood, keep the wall framing even with the plywood edges, the plywood is cut square and by aligning the framing to these edges it will make the wall square. Attach plywood to the roof framing. If you choose not to use exterior plywood you must install the interior paneling or plywood to make the walls rigid, foam sheet insulation also add rigidness to the walls.
Most windows have a plastic nailing flange on them, if you use exterior plywood, install the windows over the plywood. If the plywood is the finish material use a trim board around the window to cover the nailing flange.
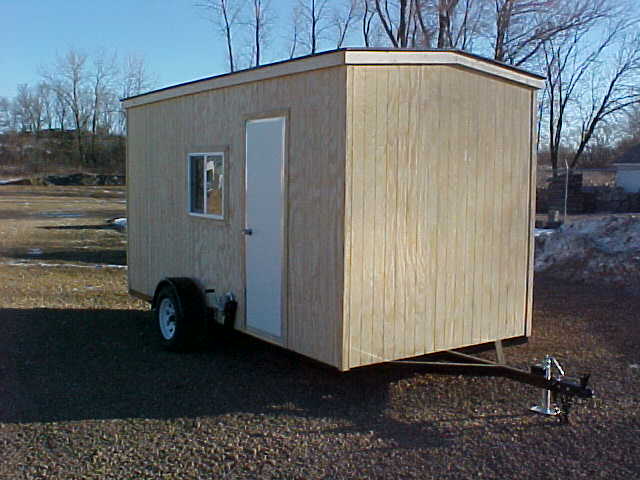
Now you should have a free standing shell
Find all your Fish House Building Supplies here , most materials used are camper/RV items.
At this time you can run gas lines and wiring for all your electrical options you might have.
If using 12 volts lighting, I recommend speaker wire, it comes 2 wires together and usually have different colored wired so you can determine positive and ground.
Keep your wiring placement simple and contained so it doesn’t become a pain while insulating around random spider web of wires.
I also have a 12 volt wiring guide explaining this.
If your planning on using a generator you can run 110v wiring for lights, TV’s and such.
After wiring you can install the 1-1/2” rigid foam insulation, cut slightly tight to fit. Any gaps can be filled with expandable foam in a can, use this around windows and doors also.
Remember when cutting the hole in the floor not to place them over a frame cross member and make sure your auger will fit in that area.
Now you can finish the interior to your heart desires. Try to use a plywood type paneling, masonite tends to soak up any humidity and warps.
I have a house construction guide explaining how to frame the walls, roof and door and window installation
Good Luck
Some Do’s and Don’t’s
Large windows are nice but there colder, easier to break and break into.
Doors on the side of the fish house must open to the back, so if the door opens while traveling at 60 mph it will get ripped off.
Don’t place hole near the door, you’ll probably step in it.
Some heaters vent exhaust through the side wall, make sure it won’t interfere with the wheels, doors, window, LP tanks. Heaters with a fan require power and if only running a battery it will drain quickly.
Don’t’ place too much weight in the front, you won’t be able to manually lift the tongue.
Don’t’ place too much weight in the back, the house may sway while going down the road.
Use retaining pins to hold wheels in place, don’t rely on a cable or strap alone.
Place wood blocks under house if let for periods of time, easier to leave the frozen blocks behind than your house..
#1 Do
Clean up your garbage off the ice when you leave.